Page History
Objective: In this lesson you will create a Space within an existing Facility.
- Open the workspace selector by clicking on the three line menu icon in the upper left corner of the system. Select the Facility workspace
- Select Facilities.

- Select a Facility Type, on Left
the appropriate facility type on left panel.

- Double click on the Facility Double Click on the row or click on the pencil icon.
 "Pencil" icon you wish to add a space/s.
- Click the “+” sign button.
 Click the “Plus” sign
- Enter the detailed information using within the four three tabs across the top of the Facility Detail window. Click Save when complete
 Continue entering additional spaces as needed.
 - Confirm that all spaces were created.

...
Note: Only enter in Sections when the space can be divided into multiple different areas that are reservable. Example: A basketball court with 6 goals. The court can be divided in half to have 2 games going on at the same time, therefore 2 sections need to be created in this space. Now you can reserve at a Section level or to reserve the whole court you reserve at the Space level within the Activity.
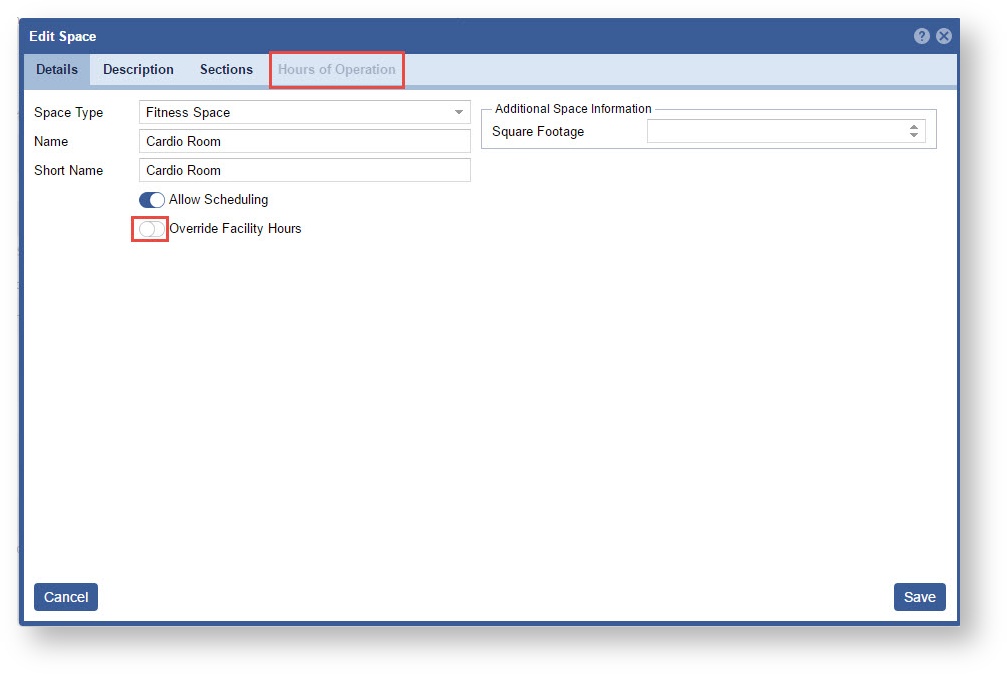
- If the space has different Hours of Operation than the Facility toggle the "Override Facility Hours" ON in order for the Hours of Operation tab to open.
Note: This will only override Facility Hours for this Space. The other spaces will still retain the Facility Hours.
Otherwise, click the "Save" button when complete.