Setup Facebook posts to CMS
Step-by-step guide
Setup Required
Prior to setting up CMS Admin will need to grant access to Facebook Sync in CMS.
Facebook Setup
Send Facebook ID
Before beginning you will need to provide your Facebook ID. You can find this by logging into the Facebook account with which you intend to create posts.
- Click your User Name, in the Title bar.
- You will arrive on your home screen and can notate your user ID by looking at the page URL.

- Click on your User Name, see circle 1.
- Capture your User URL, see circle 2.
In this case the URL is https://www.facebook.com/YoutNameHere
Forward this URL to Angela Baker (angela.baker@navy.mil) .
Register and confirm invite
An invitation will be sent to your Facebook account. Login and access the notification area.

Select the Register Now, then click Confirm.
Note: you will not receive a confirmation email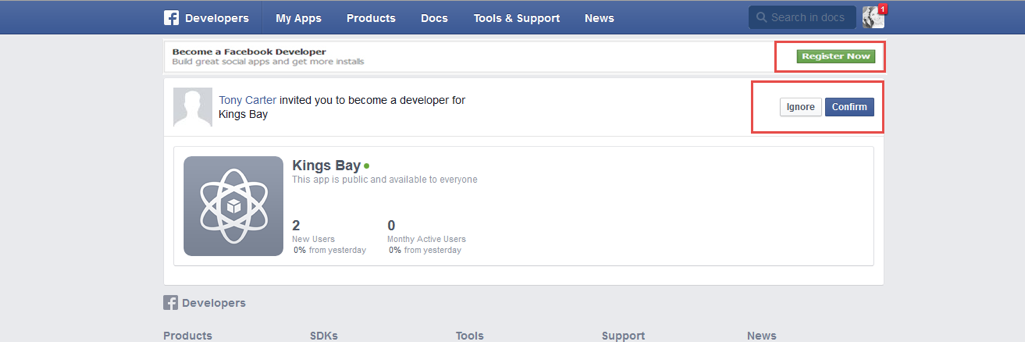
Configure WebCentralMake sure that all Personal Facebook sessions are closed prior to beginning. You must be logged into a Facebook account that has access to the Command page.
Login to WebCentral and go to Admin
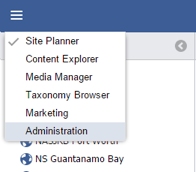
Select “Facebook Sync”
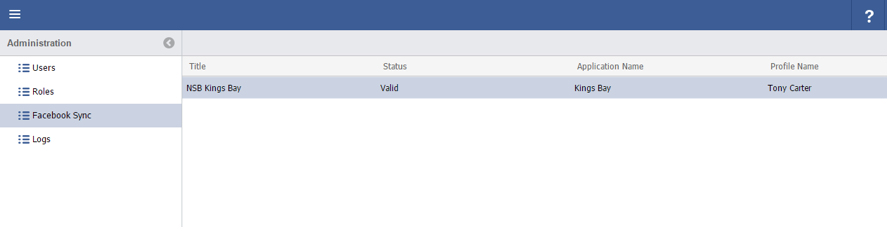
Double click your installation
Continue as "Your User Name"

Toggle the Installation Page
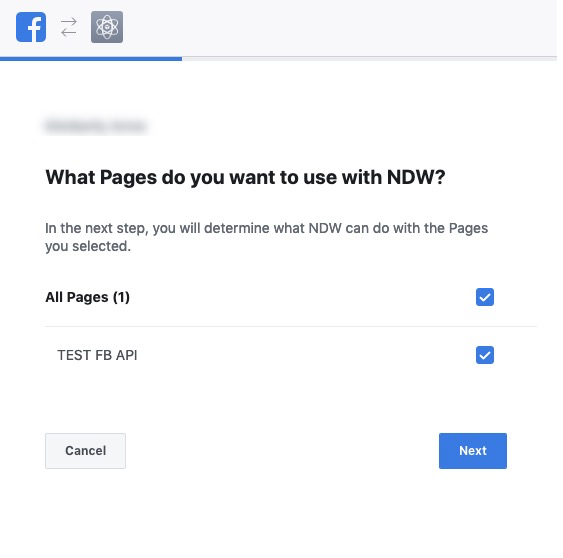
Select "Yes", on all toggles.
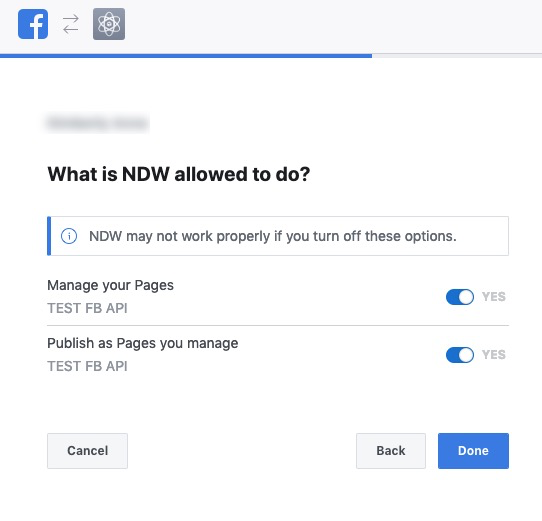
Raven will confirm FB link has been established.

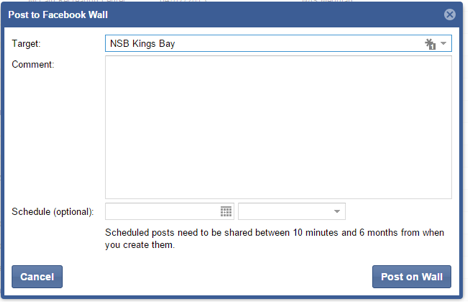
Test Configuration
Go to Events or Classes and post to Facebook.
You can enter an optional comment and schedule the dates in which you wish to post.